About Me

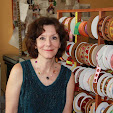
My photo
I am a studio artist and textile designer. My work swirls around among art, design, and the joy of making things. I founded LFN Textiles Artists Ribbons in 2002, and have been designing these fairly wonderful ribbons for 8 years now. They are distributed for the wholesale market exclusively by Renaissance Ribbons, and are available at retail on my website, www.lfntextiles.com, and nationwide through fine fabric stores, gift shops. My tapestries are available through a number of galleries across the country as well. See the links section for contact information.

Wednesday, February 11, 2009

where I work


I was writing to someone today describing the wonderful place where I live & work and I thought, I should post this on the blog. So here is my beautiful studio building in New Harmony. I am smack dab in the middle of Main Street, and my studio comprises the second floor of what is actually two buildings.

The building on the left houses the gallery shop of the New Harmony Gallery of Contemporary Art. I sold ribbon here long before I moved to New Harmony: I was bemused by the number of people, who when seeing my ribbons, would comment "you know, I bought some of these ribbons in a small town in Indiana ..."

The building on the right ensconces the venerable Main Cafe, which has been noted in a column by Jane & Michael Stern (who write about good regional food on the road). They are open from 5:30 am to 1:00 pm: how's that for a working day? I smell bacon & eggs all day upstairs.

Crate & Barrel Time


I have five new products online now at Crate & Barrel!
Tulip cocktail napkins
Wildflower Doormat
Garden Harvest Embroidered Towel
Allium Waffle Embroidered Towel
Stones Pillow
And for the bargain-minded among you, here are some LFN sale items

Stones Pillow
Auricula Towels
Arbor Towels
Teapot towels (embroidered)
Teapot towels (print)
Fruit compote towels
Quinlan Apron. Potholder & Mitt:

Monday, February 2, 2009

ribbon trimmed linens


I posted my sister Cathy's tips about sewing with my ribbons a few weeks ago; she has made many things with them, trimming towels and pillowcases and placemats. Here are a couple more tips:

My ribbons are almost all polyester, which is, sigh, a plastic. The upside of this is that they are amazingly durable! and also that plastic MELTS at certain temperatures. I have a little wood burner tool which has been essential to making things with ribbon: it looks like a pen, has a variety of tips, and is available at crafts stores for under $10 (unless you get the fancy kits, which are overrated). I use a long, conical pointed tip, and a steel straightedge, to cut the ribbon when I don't want the ends to ravel. You need to do this on a metal surface (I use a sheet of craft aluminum, but before I found that I was using the removable base of a cake pan). The tool has to be very hot, and do watch your fingers! And don't inhale while you do it, as the fumes of burning polyester can't be good for you!

The other issue with this melting point is that if you iron over ribbon, you must use a low heat setting. Otherwise the heat of the iron will make the ribbon shrink, and if it is already sewn down, that makes for serious puckering. You can pre-shrink it by ironing it first, and then sewing it down, if it is going on 100% cotton or linen that you know will have to be ironed.

OK, with that, onto the linens! I used to buy white cotton pillowcases wholesale, sew ribbon along their hems, and sell them in pairs at bazaars. Lovely gifts. Sometimes, like my sister does, I would make the pillowcases from scratch; this is great for gifts, and you can choose from so many wonderful fabrics that way, but tends to get expensive if you want to re-sell them. I also would buy wholesale linen fingertip towels and sew ribbon on the hems, package them in cello bags and re-sell at wholesale along with the ribbons (when I was still wholesaling ribbon). For some reason a linen guest towel commands a higher price than a pillowcase or a kitchen towel.

One of these days, when I get further into web design (I do it all myself) I will include these ribbon ideas on my website. Until then, here's my blog!

photo: Kelly McKaig illustration: Anna Brewer

Tuesday, January 6, 2009

Tree Trimming

Another beautiful photo by Kelly McKaig, this of my Trees ribbon trimming a straw hat and a velvet throw.

The Tree ribbon was inspired by a William Morris tapestry entitled Woodpecker. I added the blue spruce to bring in that beautiful blue green acanthus leaves Morris used.

book markings re-visited

This is the photo, by Kelly McKaig, that inspired Anna to do the drawing in the last post. The ribbons shown here are How to Knit (similar to my more recent Knit Wit ribbon) and Manikin. I sewed the ribbons into cloth bookcovers, made much the same way I used to cover books in folded brown paper (re-cycled grocery bags!) when I was a school girl.

Saturday, January 3, 2009

ribbon marks

Some time ago I asked Anna Brewer, one of the most talented illustrators I know, to do a series of drawings of things to do with the ribbons I design. I will begin posting these charming drawings to share the ideas with you. Mark Your Books -- from using a ribbon as a bookmark to binding it into handmade books. It features several ribbons: Seven-Circuit Labyrinth, Labyrinth, Oranges, and Manikin.

Be sure to look at Anna's own blog, Frogblog -- she is unsurpassed as an observer of nature!

ribbon sewing tips from my sister


My sister Cathy has been an avid supporter of my ribbon endeavors to the point where she began using it a couple of years ago on items of her own creation which she sells at craft shows in Virginia and thereabouts. Cathy has always been a much more careful seamstress than myself (all 4 of us Foster girls were brought up sewing and she & I continue the tradition!). Not to mention a better writer! So when she placed this comment a few posts ago about sewing with my ribbon, I thought it would be a good thing to have on the front page for general tips & ideas. thank you, Cathy!

"I love this ribbon! Thanks for your prompt service, Laura! I am using it as embellishment on hand towels for gifts to all the myriad of people who are not family: some colleagues, family friends, clients, service providers, etc.

"The towels I prefer are thick, burgundy hand towels I found at Marshall's. (Marshall's and T J Maxx are my favorite source of very high quality but inexpensive linens for the home.)

I've been using your ribbons for several years for my business, Camellia Cove Creations. If any of your customers are inclined to sew their own guest towels, I have several tips:
1. Prewash and dry the towels, cold setting for the wash and hot for the dryer. Use Shout color trappers if you are washing more than one color, or deep colors. If you don't prewash and dry, you run the risk of the towels shrinking and puckering your ribbon.
2. I use an old-fashioned sewing machine, with straight stitch and zig-zag stitch functions. You don't need anything fancy to achieve fantastic results.
3. Don't pre-cut a bunch of ribbon if you are embellishing more than one towel. Each towel has a unique width, even if it's from the same manufacturer. Cut one ribbon per towel.
4. Lay the ribbon along the horizontal width of the towel. Ribbons work best if they are just slightly narrower than the nap-less strip of the towel.
5. Your first seam should be straight stitch along the horizontal width with the majority of the towel crowding between the needle and the arm of the sewing machine. The beauty of lfntextiles ribbon is that there is a barely perceptible border on the edge of the ribbon. I use this border as my stitch guide.
6. At the end of the first straight stitch seam, leave the needle in the ribbon and towel; lift the presser foot and pivot; change the stitch width to zigzag and the length to very narrow; put the presser foot down; and zigzag along the edge until you reach the next corner. Leaving the needle in the ribbon/towel, lift the presser foot, pivot the fabric, put the presser foot down, and change the width back to straight stitch and the length to 10-12 stitches per inch. Sew in straight stitch to the edge of the towel, and repeat changes to zigzag width and length. Zigzag stitch to final corner; tack back, and you're done.

I get rave reviews from customers and friends about these towels.

Sincerely,
Cathy Walsh
Camellia Cove Creations"