About Me

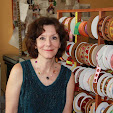
My photo
I am a studio artist and textile designer. My work swirls around among art, design, and the joy of making things. I founded LFN Textiles Artists Ribbons in 2002, and have been designing these fairly wonderful ribbons for 8 years now. They are distributed for the wholesale market exclusively by Renaissance Ribbons, and are available at retail on my website, www.lfntextiles.com, and nationwide through fine fabric stores, gift shops. My tapestries are available through a number of galleries across the country as well. See the links section for contact information.

Friday, August 26, 2011

travel pincushion

I have been fascinated recently with the idea of sewing kits.  I am more & more convinced that everyone should know how to sew, and  that everyone should certainly begin to re-value possessions enough to consider mending them.  I have made other needle books and sewing kits before. 

I just filled an order for 125 "housewife" sewing kits for the Monticello gift shop (yes, that Monticello) based on Martha Jefferson's daughter's pocket sewing kit.  The idea of a housewife was to carry your sewing kit with you on travels (I expect it got the name from soldiers carrying them into the battlefields, to take the place of their loving wives in mending their socks).  It is ingenious, a length of fabric with pockets into which fit your little necessities.  I put tiny embroidery scissors, buttons, small spools of thread, needle threader, and needles & pins in the ones I made. I was quite a production line with many steps, and I was proud in a Henry Ford kind of way to do hand crafted items on that level of production (and make any money at all!)  I made two versions, one in sober blue & white like the original, and one in kid-friendly colors.  All fabrics were reproductions from the same era as the original.  This project was so much fun!
the original Housewife, from Monticello's collections

my version of a housewife in child-friendly colors, all reproduction fabrics from the era.

Yesterday I was playing with some of those lovely little tins -- I had bought them to put beeswax-based salves in, another kind of hobby obsession I have, to make things that smell good -- and it occurred to me that they would be great for little pincushions with lids to carry around.  So here they are.  They are trimmed with my Quilting ribbon and the fabric inside is an early 19th century reproduction fabric, left over from making the housewives (thrift, of course, is a value too!).

three travel pincusions in 2" tins.

Wednesday, August 17, 2011

Ribbon crazy quilt

Today I was sent a link to a delightful blog by Allison Aller, Allie's in Stitches, by my partner ribbon company, Renaissance Ribbons.  They commissioned Allie to make a crazy quilt using a variety of their ribbons and I spotted a great number of my own, along with their Kaffe Fassett ribbons and several other RR exclusives.  I wrote to Allie and asked her permission to link to her blog and use her photos, and she wrote a charming acceptance which I just had to quote here:

"Hi Laura!
How that great that you found this....
I've been a fan and user of your designs for years.  When I walked by RR's booth at Quilt Market I was stopped in my tracks...there were my beloved ribbons!  So I contacted Edith and begged her to let me use some of them in a quilt for her.  We settled on an orange/pink scheme, and I was in heaven working on it.
So yes indeed, you may link to this and use whatever photos you like.  I am attaching a pic of the quilt after I added a few more touches, though.  Take your pick!
And keep up your great work; you make many, many crazy quilters very happy.
My best,
Allie

p.s. I loved your ribbon dress... ;-)"
Oh gee!  so flattering.  You know, often when I pick up the phone and identify myself to someone calling about something on my website, I get this surprised and happy reaction that I answer my own phone.  "You mean this is THE Laura?"  Folks, this is a tiny world here.  I am not a corporation or even really a company, it is just me!  And Renaissance is around half a dozen lovely and knowable people too.  These connections between creative people are so meaningful and inspiring.  I am always so delighted to know that out in that great big world there, someone is familiar with -- and likes! and uses! -- something I have designed. 

And I like what Allie has done.  Here are some teaser photos, to see the whole project go to her blog, Allie's in Stitches
ribbons, coutesy Allison Aller

tutorial shot, courtesy Allison Aller
finished quilt, Renaissance 9 Patch by Allison Aller

Monday, August 8, 2011

Ribbon Cakes by Melissa Bickle

One of the best booths I saw at the Craft & Hobby Association trade show in July was Ribbon Rings.  The actual product being sold were called "ribbon tamers", clever devices for keeping ribbon samples straight and organized (I sure could have used them in the old days when I wholesaled my own ribbons!).  But the booth itself had these tremendously ornate cakes & cupcakes made of ribbon curls and furbelows.  Amazing!  I snapped some photos so here you see designer Melissa Bickle with some of the cakes (she is as pretty as the cakes), and then I found she wrote a book on how to make them, available at Amazon, called A Notion to Celebrate


Ribbon Cake and Ribbon Cupcakes by Ribbon Rings

Ribbon Wedding Cake

ribbon cupcakes and ribbon doughnuts

Thursday, August 4, 2011

How to Make the Ribbon Dress

I am not very adept at writing tutorials but if you will bear with me, I will show you a bit of how I constructed my ribbon dress in yesterday's post. A real apology: I have been between cameras, and these photos were taken with my not-very-smart phone.

I used the basic party dress pattern from The Party Dress Book by Mary Adams. I traced the bodice pattern pieces onto fusible interfacing, and placed each piece fusible side up on my ironing board (shown here covered with one of my old Crate & Barrel tea towels!).

Then I cut the ribbons for this piece carefully to a length about 1" wider than the widest part of this bodice, adding extra where necessary for complete whole flower motifs. This is where it gets tricky: I chose this ribbon becasue each repeat was square: i.e., each flower was as tall as it was wide, so when it is crossed perpendicular with a woven ribbon it will line up the pattern almost perfectly. I chose 3 colorways of the same ribbon (Lacy Flowers) as they all coordinated well, but you could also weave solid color ribbons in one direction and patterned ribbons in the other. I pinned each ribbon in place at its edge, straight into the ironing board.


By lifting up every other ribbon, I laid down the first row of weft ribbon. I pushed it hard up against the pins and made sure the flower motifs lined up.


I continued to weave in ribbon strips until the whole piece was woven, then I carefully pressed it with my iron, using the setting for polyester. You have to hold the iron in place in eavery spot for a few seconds so the fusible interfacing will bond to the ribbon.


Then I carefully turned it over and ironed it again to make sure it was fused, and then cut around the pattern shape. I took it over to the sewing machine and ran a basting stitch around the edge to hold the ribbons in place further. I repeated this process for each bodice section, and then sewed it together at the seams and clipped them and pressed them open.


The skirt looked easier to do: it was a full circle skirt, and I had an idea of radiating ribbon stripes stitched down to a fabric ground. I chose nylon netting as my under fabric, but that was a MISTAKE, I should have used something firmly woven and lightweight. The netting stretched out of shape and caused the ribbons to buckle. I lost count of the number of yards of ribbon I sewed down. I sewed most of them down the entire length, so I worked in groups, first laying out the reds like spokes of a wheel, then sewing, then adding color or pattern between all around & sewing down, etc. I probably would have done better to get more mathematical and stitch more pieces cut from the middle down and attach them first, then ending up with the ribbons running all the way down from the waist. It would have been less bulky at the top. But I have the temperament to think out sewing projects in my head, do minimal calculations, and then make it up as I go along!


I then constructed the dress, putting in a back zipper, cutting the hem evenly, and making a big frilly net petticoat to hold the skirt out.  Around the hem, to help it to stand out more fully, I sewwed a ribbon edging.   This is a cool thing about polyester: as this is a curved edge there is of course a differential in the lengths of the inner & outer curves.  So you press the top edge of the ribbon (before sewing it down) to make it shrink evenly along its lengthe, then sew the longer bottom edge in place aroudn the skirt edge, and then sew the upper edge in place.  You might still have to ease it a bit but the shrink-shaping works very well.


A beautiful friend modeled the dress for me but she won't let me show her face or her name, so thank you, Anonymous Lady! Soon we will have more photos of the dress to post online.

Thanks too to Renaissance Ribbons for donating the grosgrain and satin ribbons used in this project. 

Wednesday, August 3, 2011

Craft and Hobby Association show, Chicago

In July I went up to Chicago to participate a bit in the huge trade show of the Craft and Hobby Association.  This is the group of manufacturers and vendors who supply the large (and small) craft stores with beads, glue, scrapbook papers, stickers, crafting tools, etc.  There is a place for designers in all of this and I went up to participate in the Designer's Showcase.  I also submitted a dress, made of ribbon and tulle, to the Crafty Couture exhibition, where better known craft project designers than I presented their ideas for dresses out of myriad kinds of craft supplies, largely paper and various embellishments.  There was one made of oilcloth & duct tape trimmed with a skirtful of bright scissors in holsters: somehow I missed photographing this! 

My dress, co-sponsored by Renaissance Ribbons, who produce all of my ribbons and sell them to the wholesale market, was made of a woven ribbon bodice and a tulle circle skirt with radiating sewn-down ribbon stripes.  I based it on the basic dress from the fabulous Party Dress Book, by Mary Adams.  I wove the entire bodice in a flat sheet with ribbons, then cut out the bodice pieces to sew together into this fitted little bustier.  The dimensions provided for the mannequin were miniscule but fortunately I have a good friend who is just that small, and she agreed to be my dress form as I made it.  It took YARDS of ribbon, and I didn't keep track of the quantity (!), though I did take photos along the way and will post them soon on this blog with a step-by-step.  I used the Lacy Flower ribbon, as it has a square repeat, which is essential if you want the pattern to work well in a woven design, and it comes in three colors which all coordinate well.  I supplemented the patterned ribbon with an array of Renaissance's beautiful grosgrains.

Below are some of the dresses on display, and the placards give the names of the creators andthe materials used.


So here is my dress, and a few of the others on display.  The color isn't great here as the light at these shows is ghastly!  Renaissance Ribbons now has the dress and will be photographing it in a much more flattering light soon, so watchthis space!